# FBGEMM_GPU Documentation
For a high-level overview of the design philosophy and brief descriptions of
various parts of FBGEMM_GPU, please see our Wiki (work in progress).
We have extensively used comments in our source files. The best and up-to-date
documentation is available in the source files.
## Building the API Documentation
`fbgemm_gpu` has both Python and C++ code. When you add new methods, functions,
you must add a description of what it is and what it does. We use Python
docstrings and C++ java style comments to document the code. Later the
documentation is generated with Sphinx and autodoc for Python and
Sphinx + Doxygen + Breathe for C++.
## General Guidelines
Here are the guidelines for all docstrings disregarding the language:
* Write docstrings together with the code. Don't leave this as a separate task.
* Code is not documentation! Put yourself in the shoes of a new developer who
has to understand what your code does and make their life easier.
* At a very minimum, add:
* A description of the method
* A description for each argument that can be passed
* Return value description
* Add usage examples, links to other methods, and limitations.
## Adding a new Docstring to the Python code
Add your PyThon docstrings to the `.py` files under the name of the methond.
Use [Google-style docstrings](https://www.sphinx-doc.org/en/master/usage/extensions/example_google.html).
Example:
```
def my_awesome_function():
"""
This class is an example of how you can write docstrings.
You can add multiple lines of those descriptions. Make sure to include
useful information about your method.
Args:
arg1 (int): This is the first arg that you can pass with this function.
Returns:
This function returns X.
Raises:
AttributeError: This function raises an error.
Example:
This is how you can use this function
>>> print("Code blocks are supported")
Note:
You can find more information
"""
```
Adding descriptions will not make them automatically published. Python modules
must be included to the corresponding `.rst` files.
To publish your docstrings:
1. Add the corresponding module method to
[fbgemm_gpu.rst](./source/fbgemm_gpu.rst).
1. To preview locally, run `make html`.
1. Submit your PR and verify the Netlify preview.
## Adding a new description to the C++ code
We keep documentation in header files with the `.h` extension as well as in
`.cpp`, `cu`, and `cuh` files.
In these files files, everything between `#ifndef DOXYGEN_THIS_WILL_BE_SKIPPED` and
`#endif` will be hidden from the HTML output. At the moment, we hide
undocumented functions in these tags. When you add descriptions to a function,
make sure to set up the `#ifndef` and `#endif` are configured correctly.
All functions are grouped by a specific group for better organization. Make
sure you add `@defgroup` to the code comments.
Follow these instructions to document, generate, and publish a new C++ description:
1. Add a description to the source header file. At a very minimum, add a description
verbatim, parameters by using the `@param` tag, and return value by using the
@return tag. You can other tags as needed.
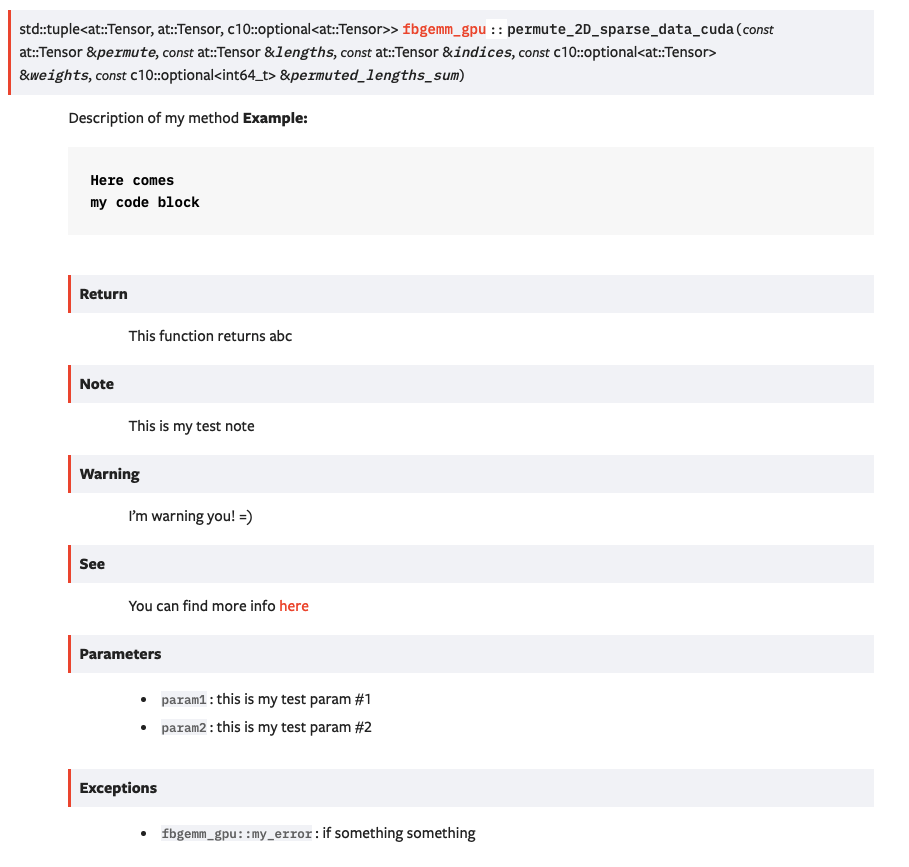
Here is an example of how it can look:
```
///@defgroup my-group
///Description of my method
///**Example:**
///```
///Here comes
///my code block
///```
///@param param1 this is my test param #1
///@param param2 this is my test param #2
///@return this function returns abc
///@note This is my test note
///@warning I'm warning you! =)
///@throw fbgemm_gpu::my_error if something something
///@see you can find more info here
```
This example generates the following HTML output:
1. Add a `doxygengroup` directive to your `.rst` file. If an `.rst` file for the
corresponding header file does not exist, create a new
one by the same name as the header file. If an `.rst` file already
exists, make sure the `doxygengroup` is defined in that file. Example
```
.. doxygengroup:: sparse-data-cuda
:content-only:
```
1. Make sure your file is included in to the `toctree` in `docs/source/index.rst`.
1. You also need include your source header file to the `INPUT` parameter
in the `Doxygen.ini` file. Most of the files are already included, but if
your doc is not building, that's one place to check.
1. Build your docs:
```
pip3 install -r requirements.txt
doxygen Doxyfile.in
make html
```
1. You can serve your docs locally with `sphinx-serve`:
```
pip install sphinx-serve
sphinx-serve -b build
```
1. Submit your PR and check the Netlify preview.